Jira
Learn how to connect your Jira account to GroWrk to manage and place orders using tickets.
Currently, the Jira integration supports the Collect for Maintenance and Offboarding order types.
Action required: Integration update
To ensure optimal performance following our February 24, 2026 update, some users may need to reconnect their Jira account.
If you encounter any syncing issues, simply disconnect and reconnect your account within the integration settings to finalize the update.
Connect your account
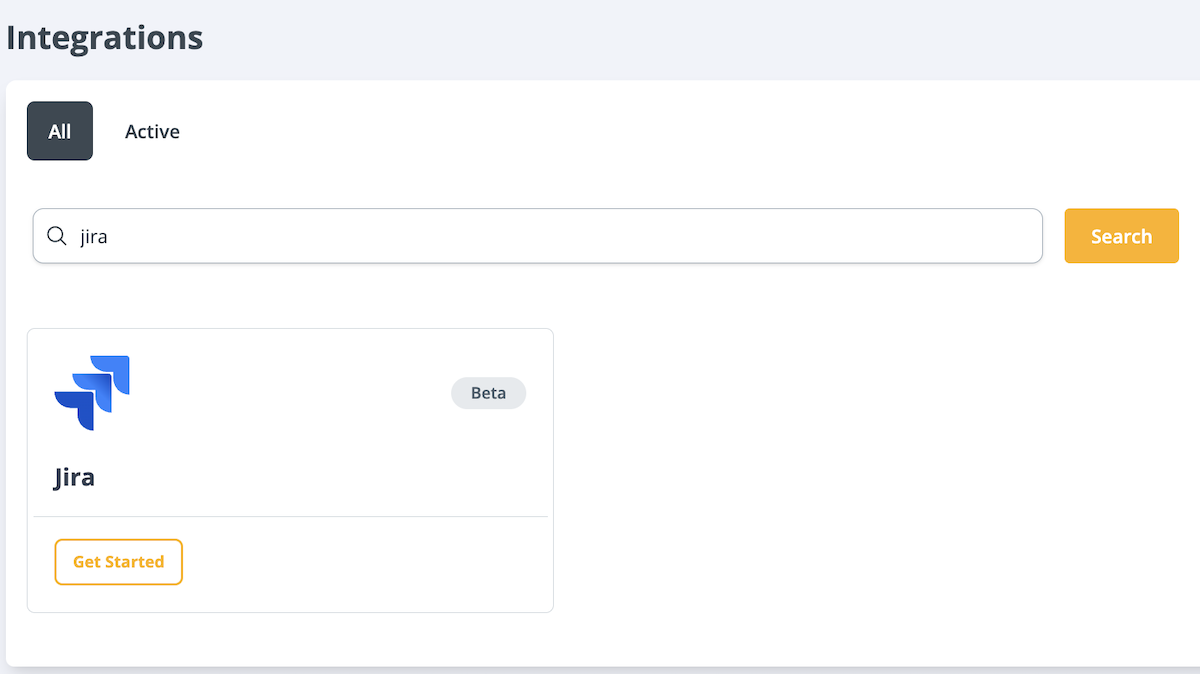
- In the Integrations page in your Dashboard, search for Jira and select Get Started.
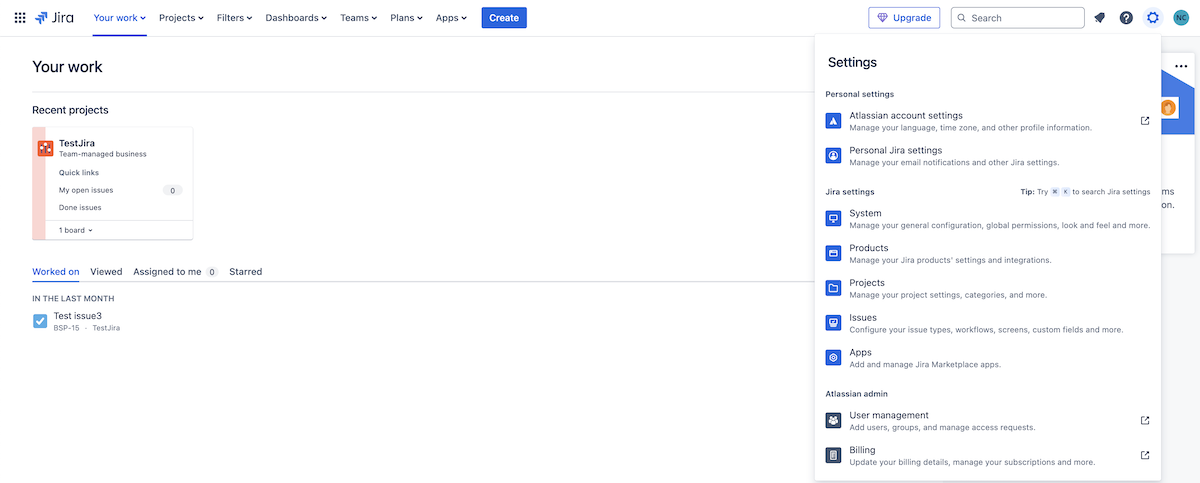
- In Jira, create an API token. Go to Settings → Atlassian account settings and select the Security tab. Select Create API Token.
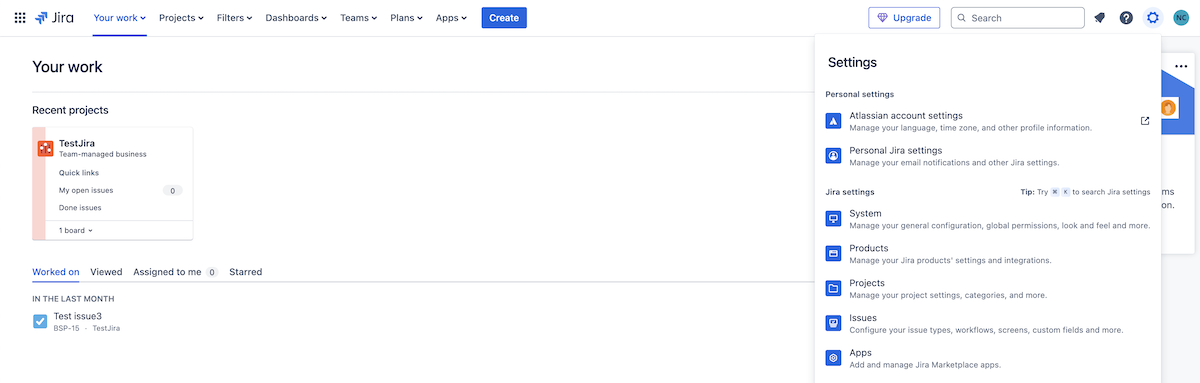

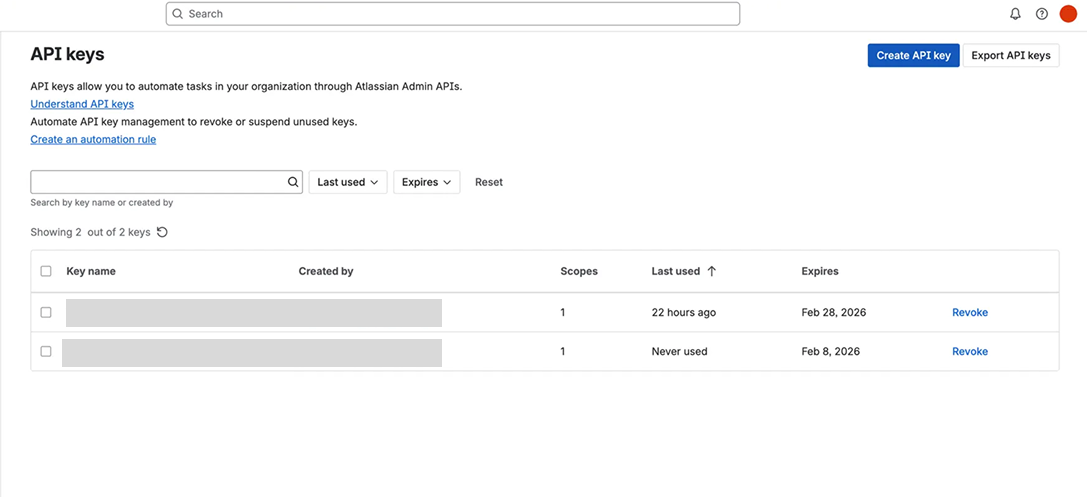
- Create an organization API key with scopes. Go to Atlassian Admin Settings → Organization Settings → API keys, and select Create API key.
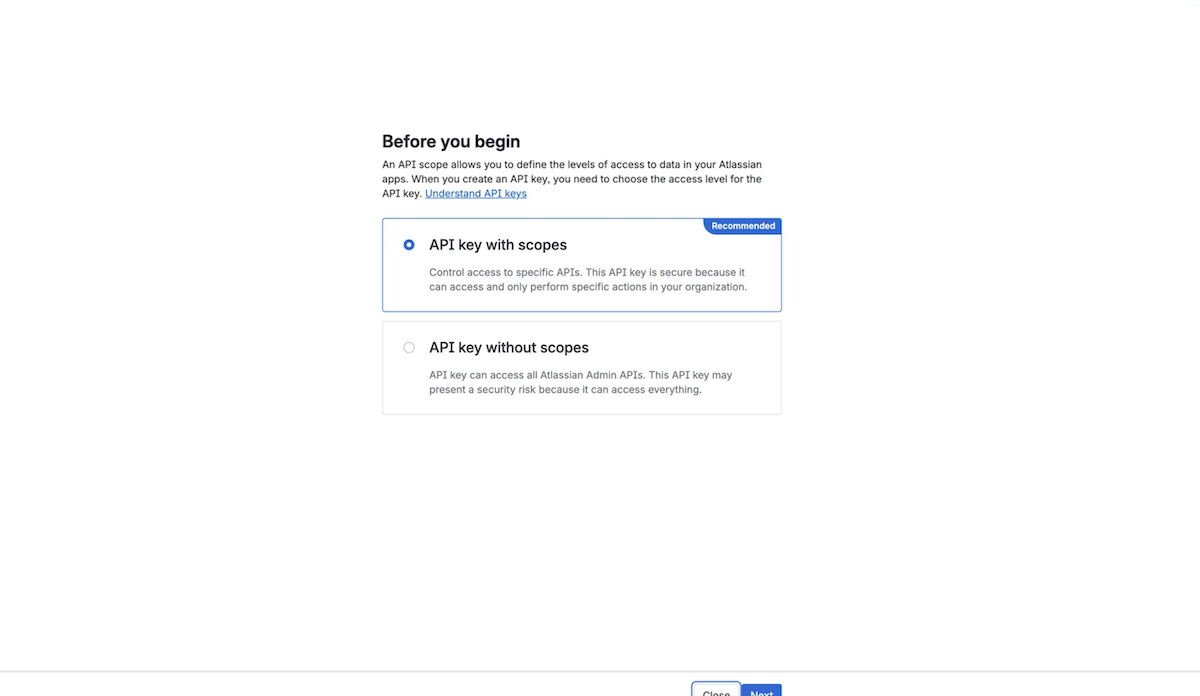
- Choose the access level for the API key. Select API key with scopes.
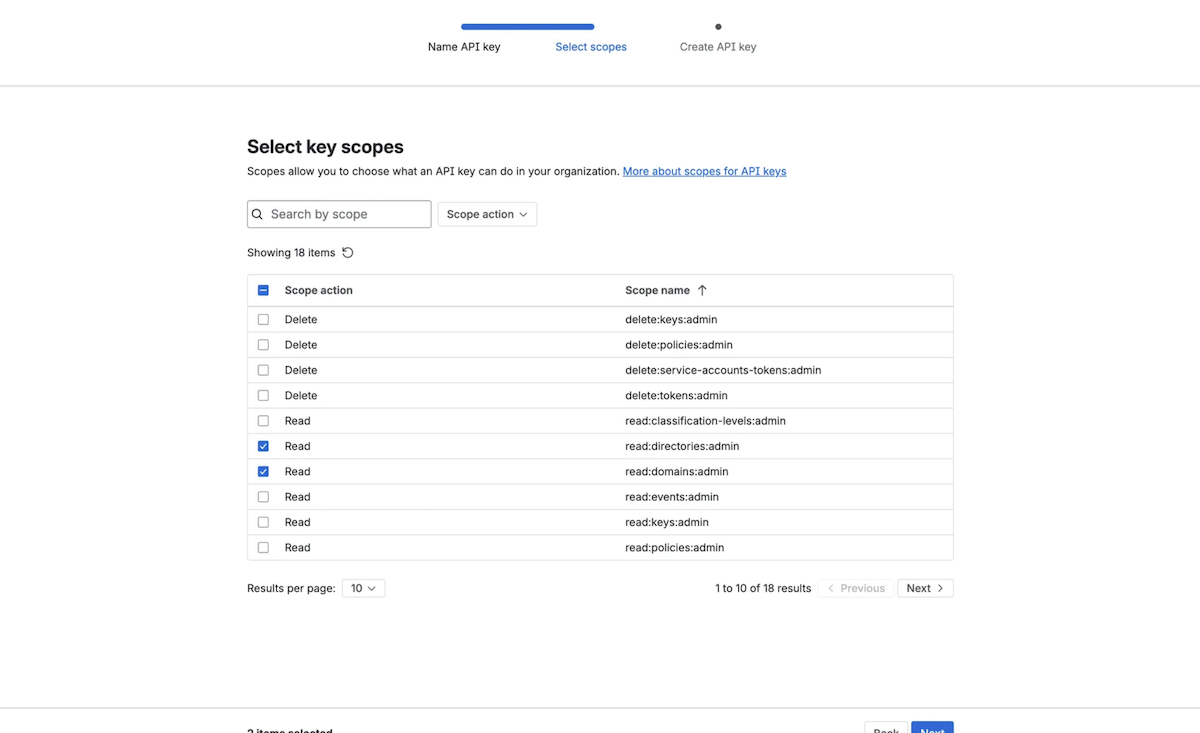
- Select key scopes, then select Next.
- Scope action: Read
- Domains
- Directories
- Workspaces
- Service accounts
- Scope action: Write
- Apps
- Service accounts
- Scope action: Read
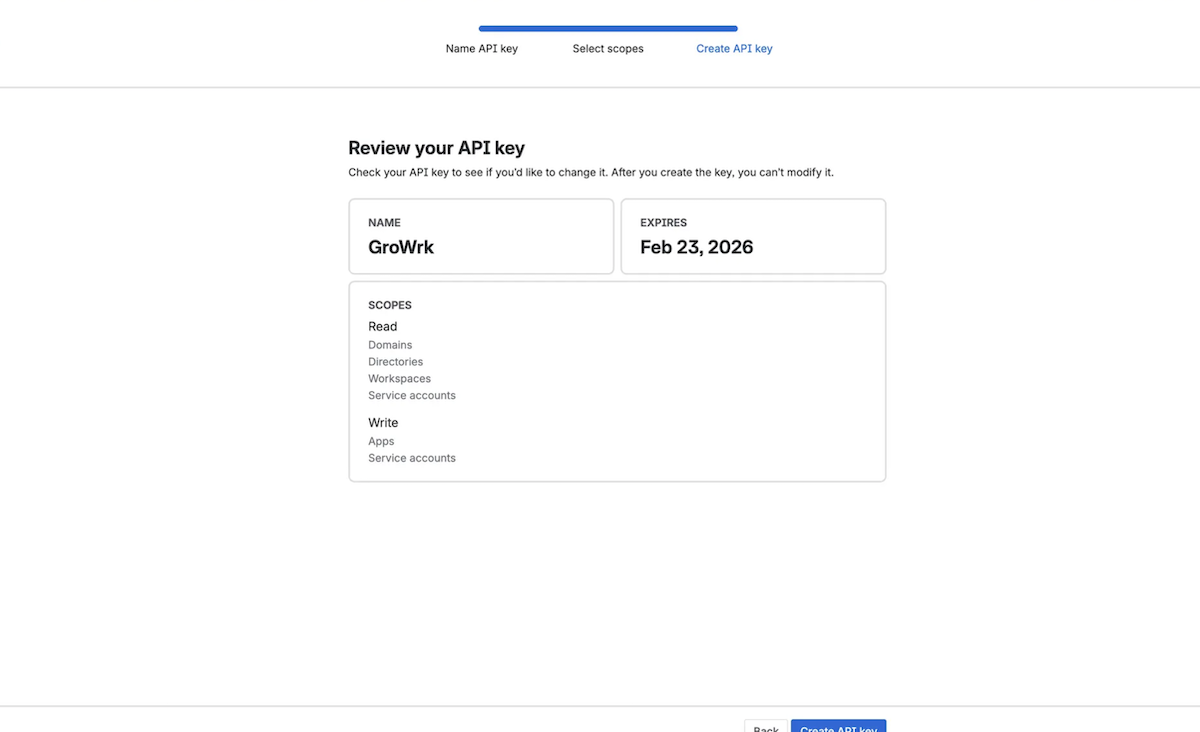
- Review your API key details, then select Create API Key.
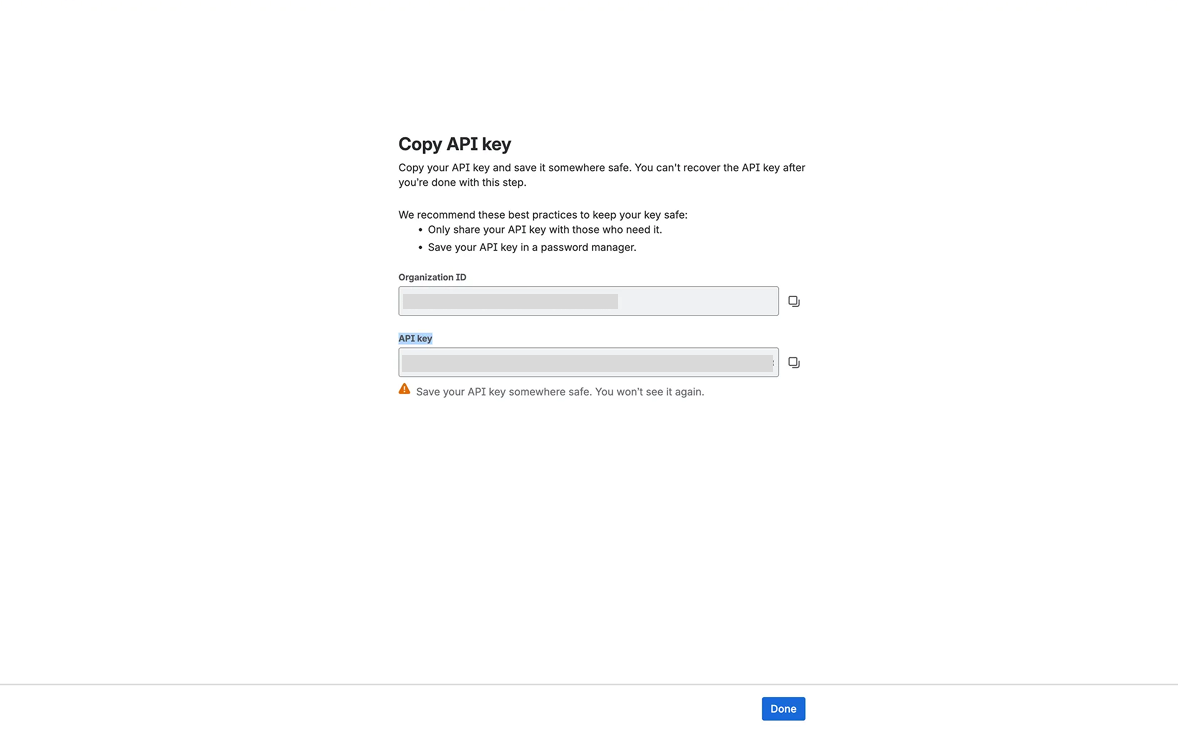
- Copy your Organization ID and API key.
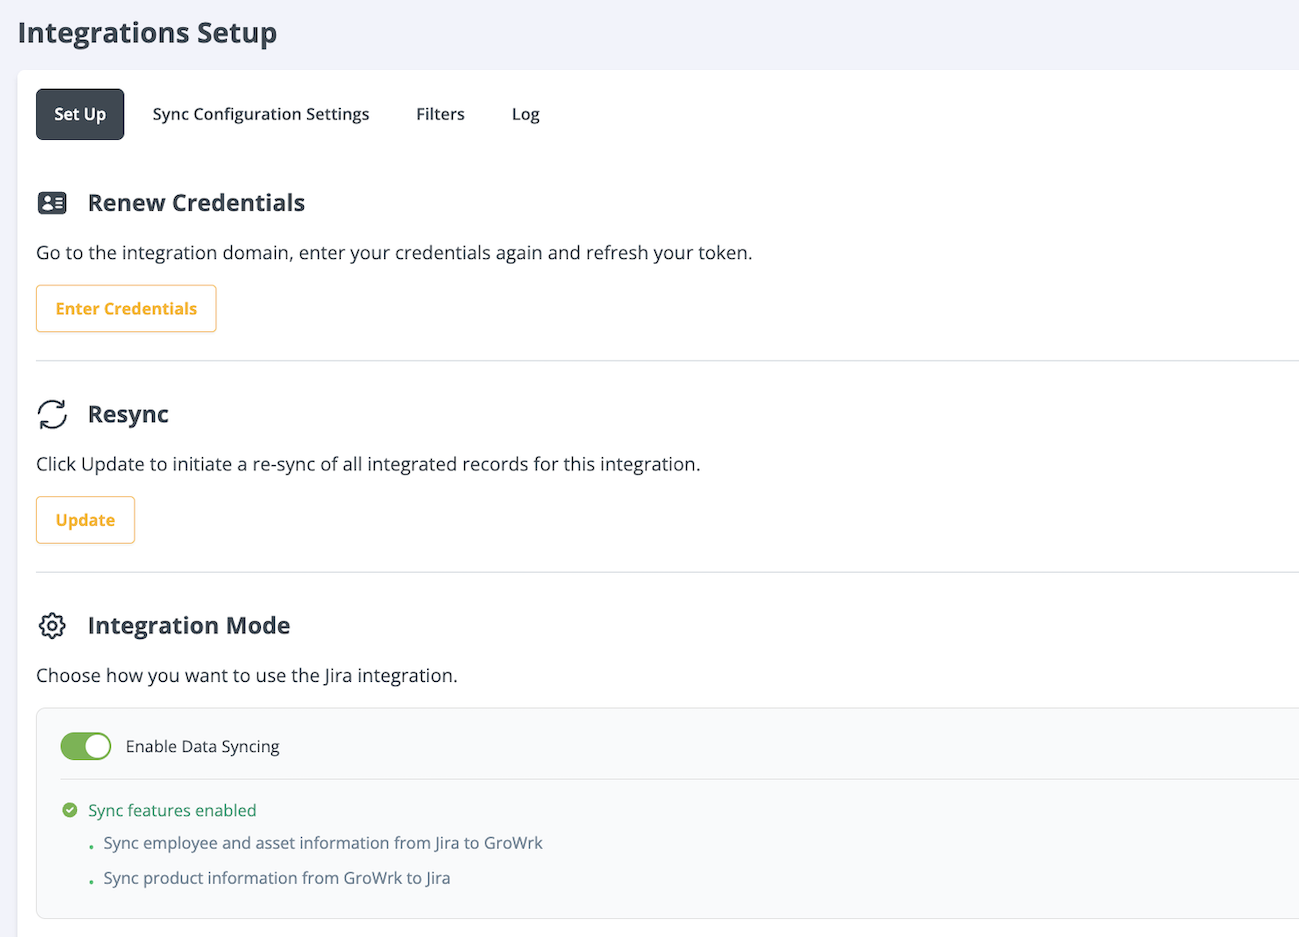
- Back in the GroWrk Integrations Setup page, enter your Jira credentials and select whether to send invitations to the Employee Dashboard to your employees. Select Set Up.
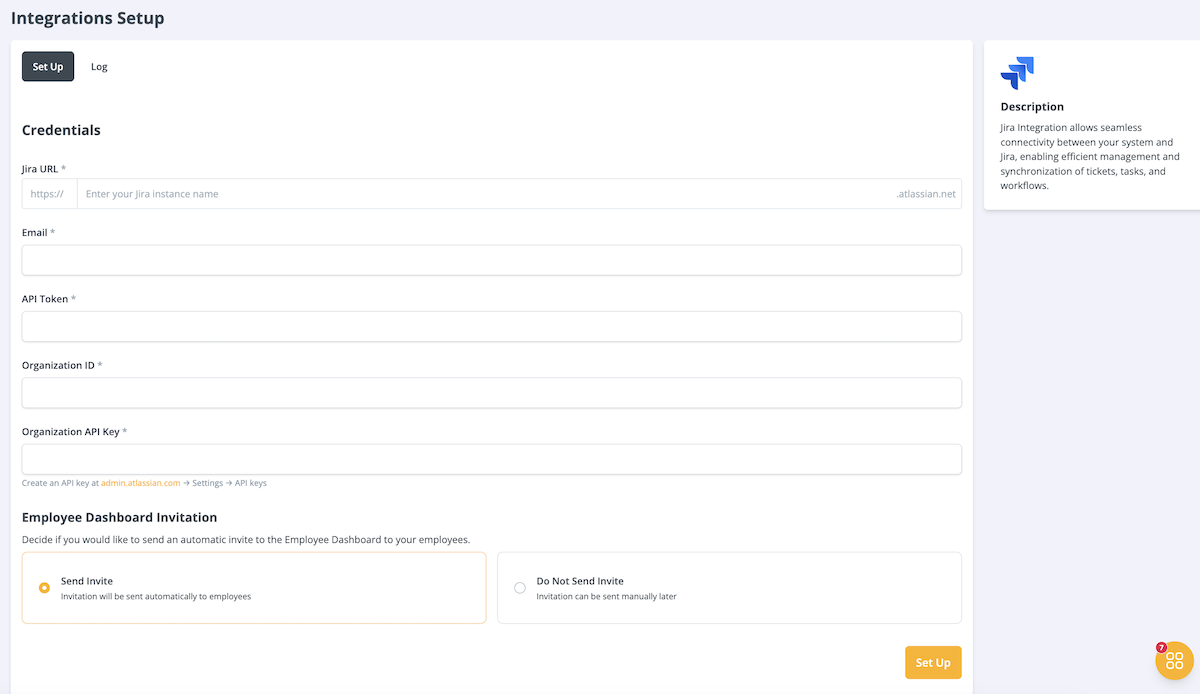
- To enable features like employee and product syncing, switch the Enable Data Syncing toggle on. Otherwise, the integration will be limited to Jira ticketing only.
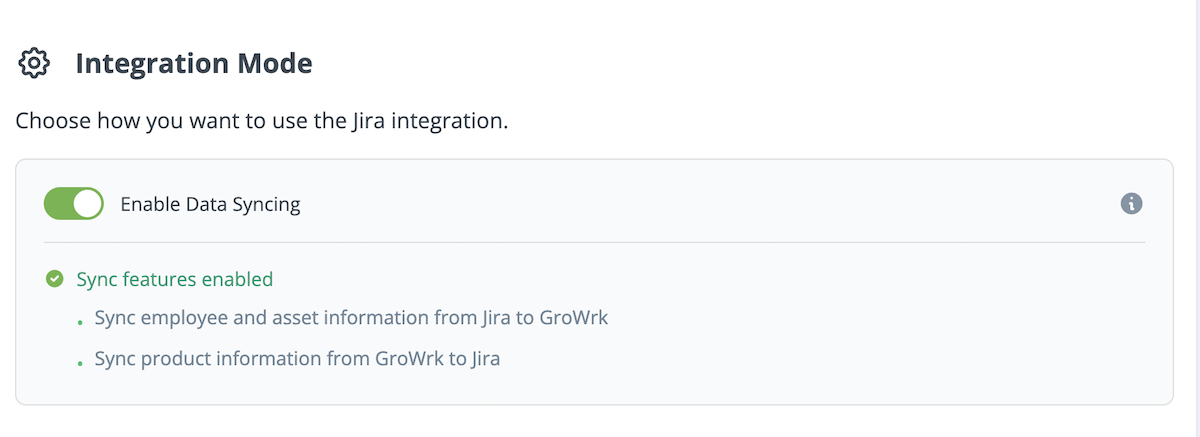
- Choose from three sync options to control your data flow:
- Jira → GroWrk: Data is imported from Jira into GroWrk
- GroWrk → Jira: Data is exported from GroWrk to Jira
- Bidirectional Sync: Data flows in both directions between systems

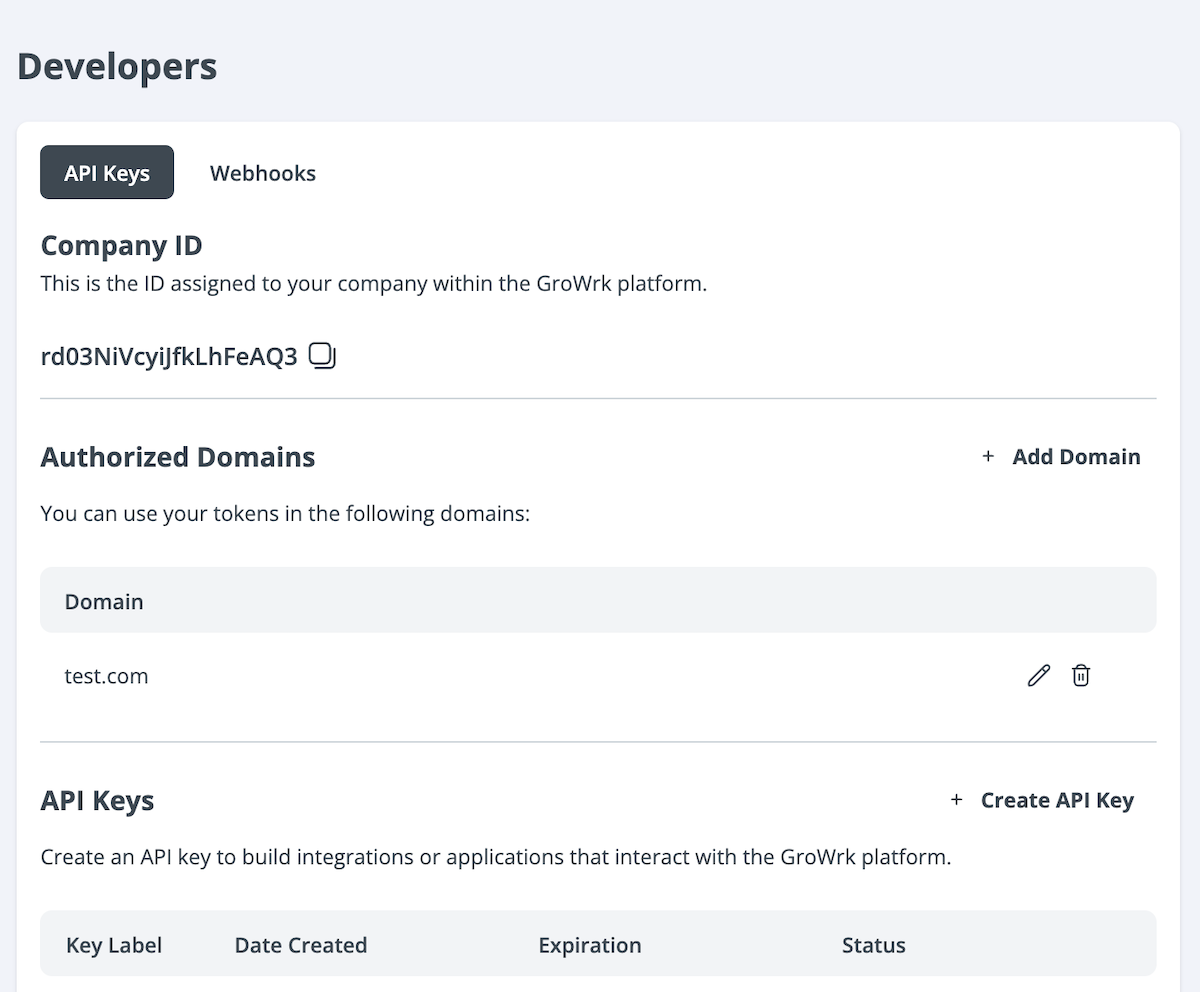
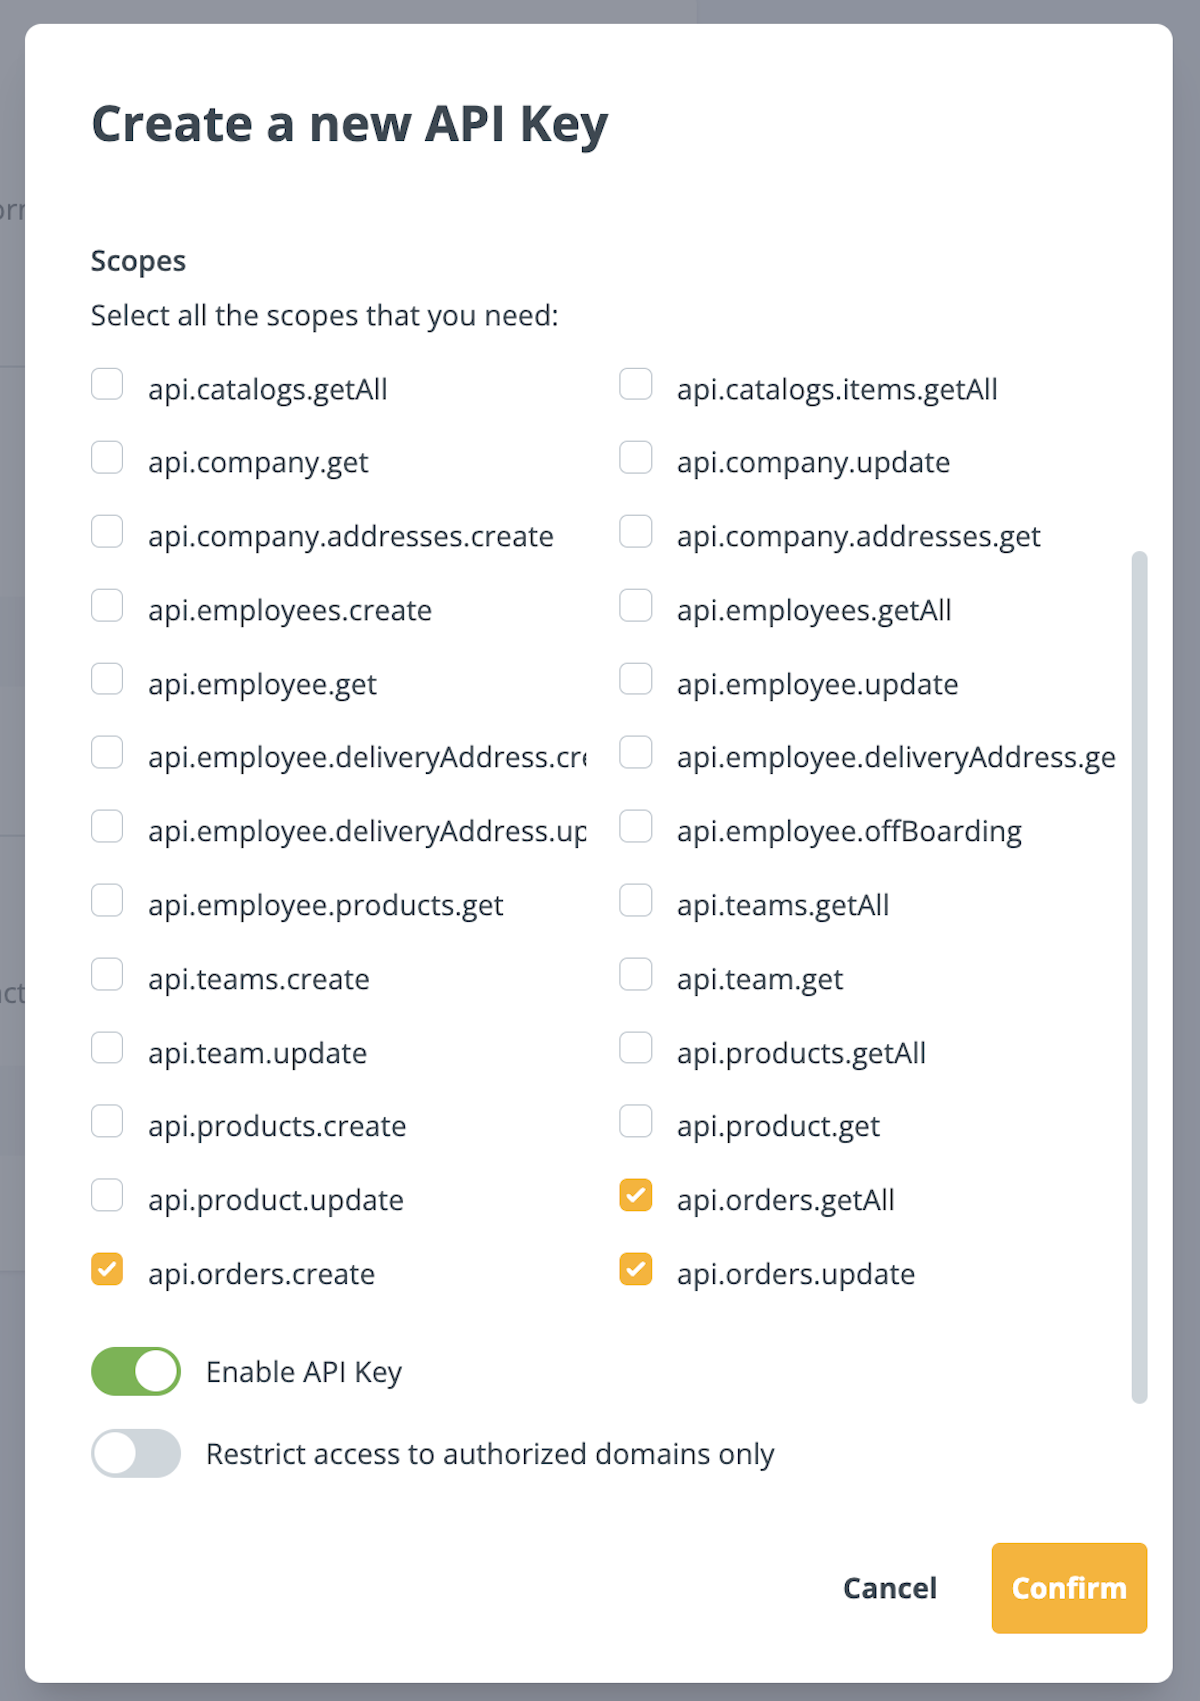
- In GroWrk, create an API key to create orders. Go to the Developers page and select Create API Key.
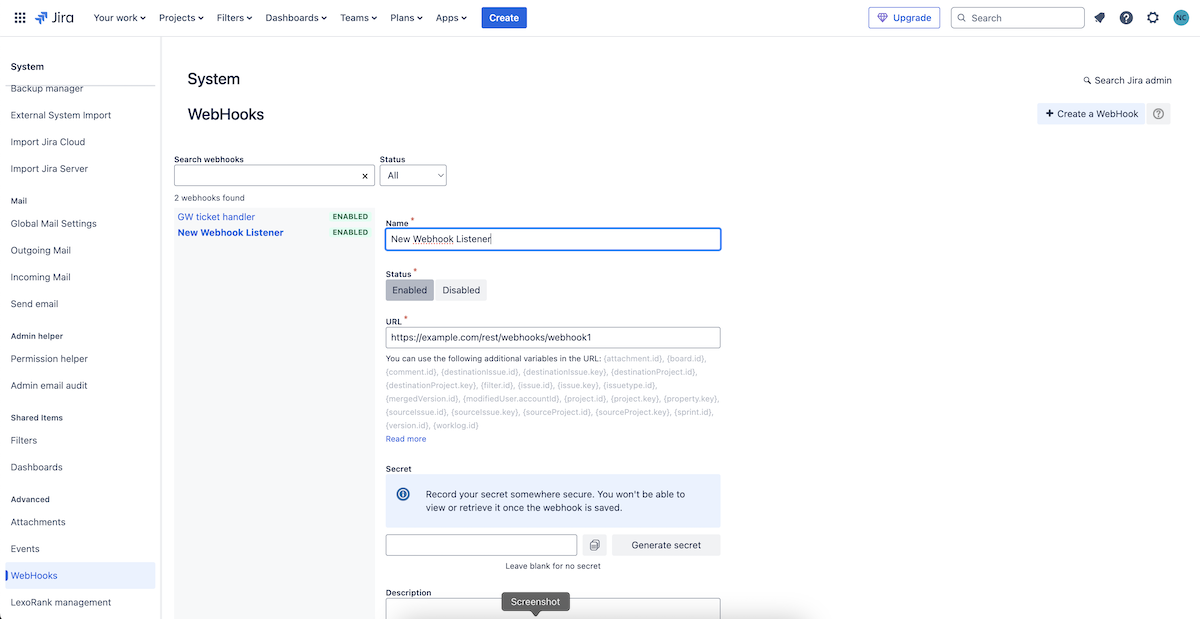
- In Jira, create a webhook. Go to Settings → System and Webhooks tab.
- Select Create a Webhook. Set the following fields:
- URL: https://io.growrk.com/api/webhooks/jira/ticket-event?apiKey={GW_API_KEY}
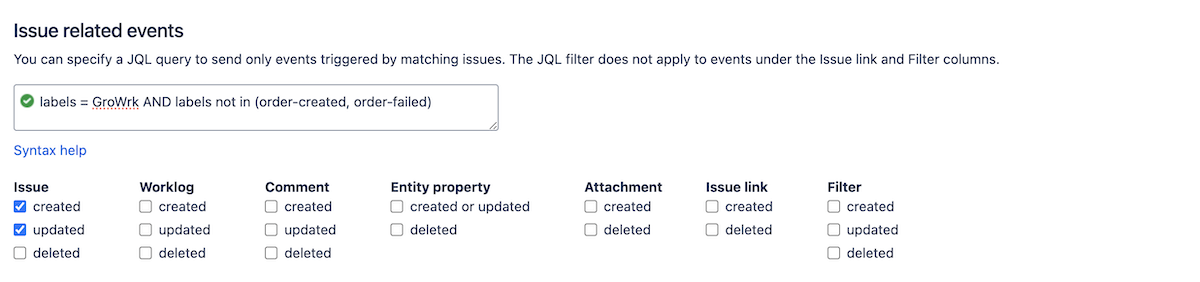
- Issue related events/JQL: labels = GroWrk AND labels not in (order-created, order-failed)
- Issue related events/issue: created, updated
Filters
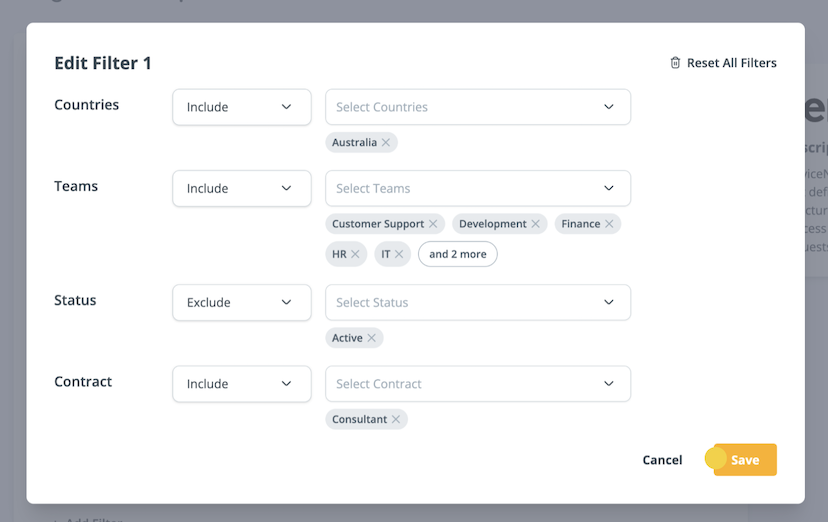
If you select GroWrk → Jira or Bidirectional Sync, customize and set filters for syncing your GroWrk account data to Jira in the Filters tab. There are two groups of filters: employee data and product data.
- In the Integrations Setup page, select the Filters tab. To edit, select the edit icon.
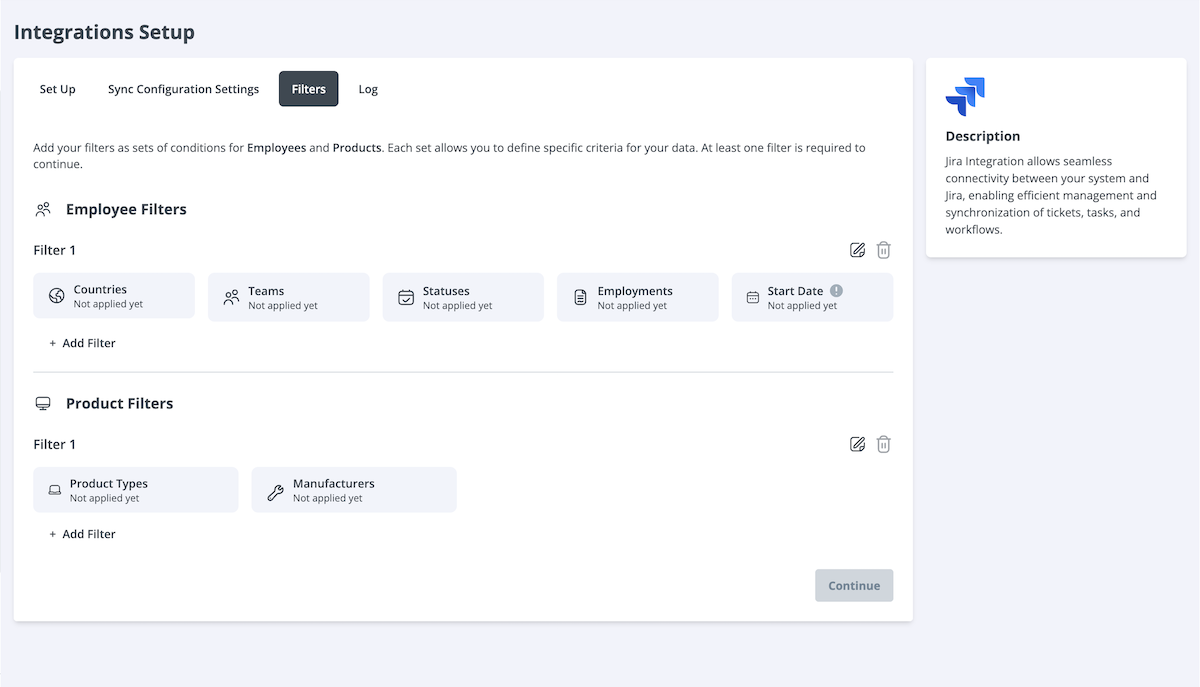
- Set up employee filters. Select the filter type (Include or Exclude) and make your filter selections. Select Save.
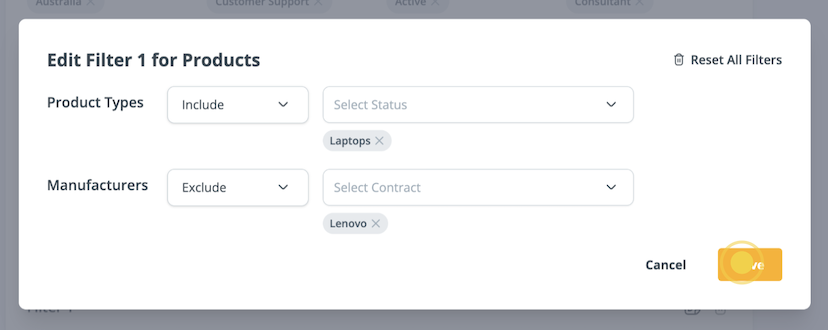
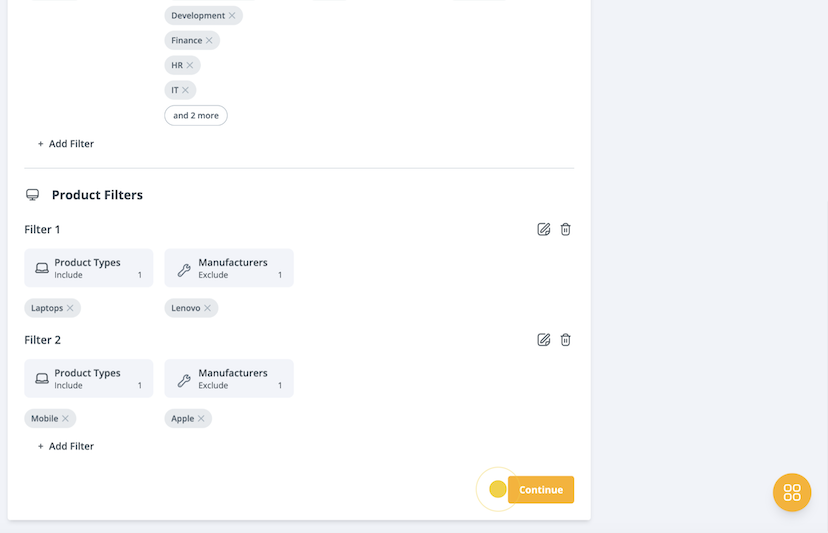
- Set up product filters. Select the filter type (Include or Exclude) and make your filter selections. Select Save.
- Select Continue to save and apply the filters to your data.
Synced Fields
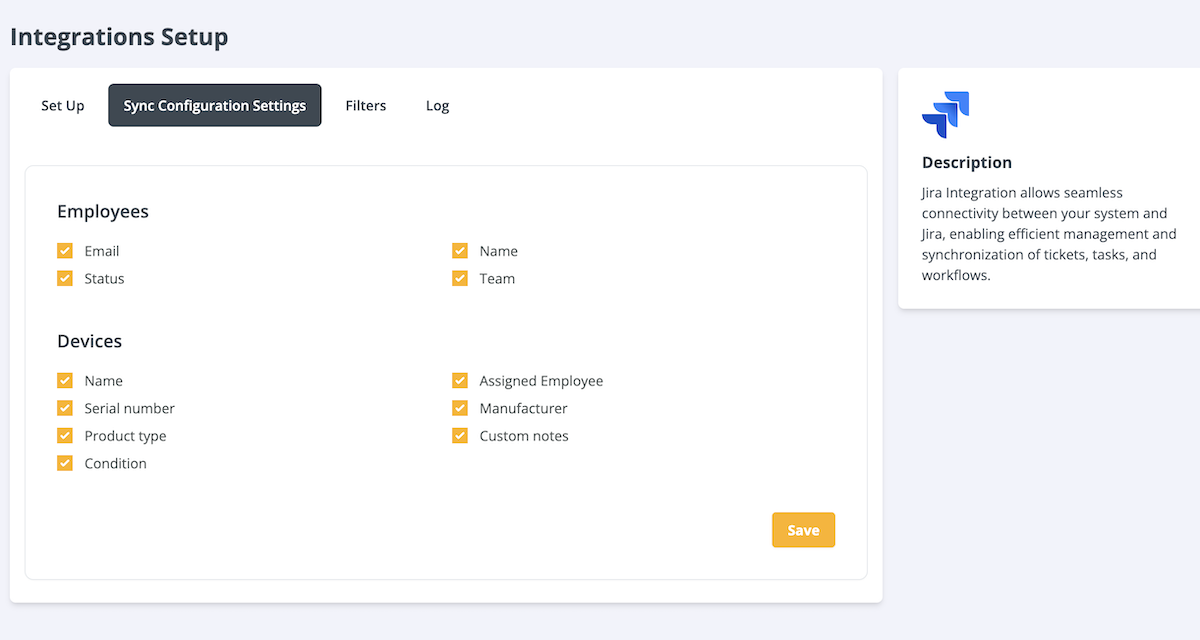
If you select Jira → GroWrk or Bidirectional Sync, select which fields will be synced from Jira to GroWrk in the Sync Configuration Settings tab.
- Back to the Integrations Setup page, select the Sync Configuration Settings tab. Choose which employee and device fields to sync from Jira, then select Save.
- You will need to resync the integration to apply the changes. Select the Set Up tab. In the Resync section, select Update.
Create a Collect for Maintenance order
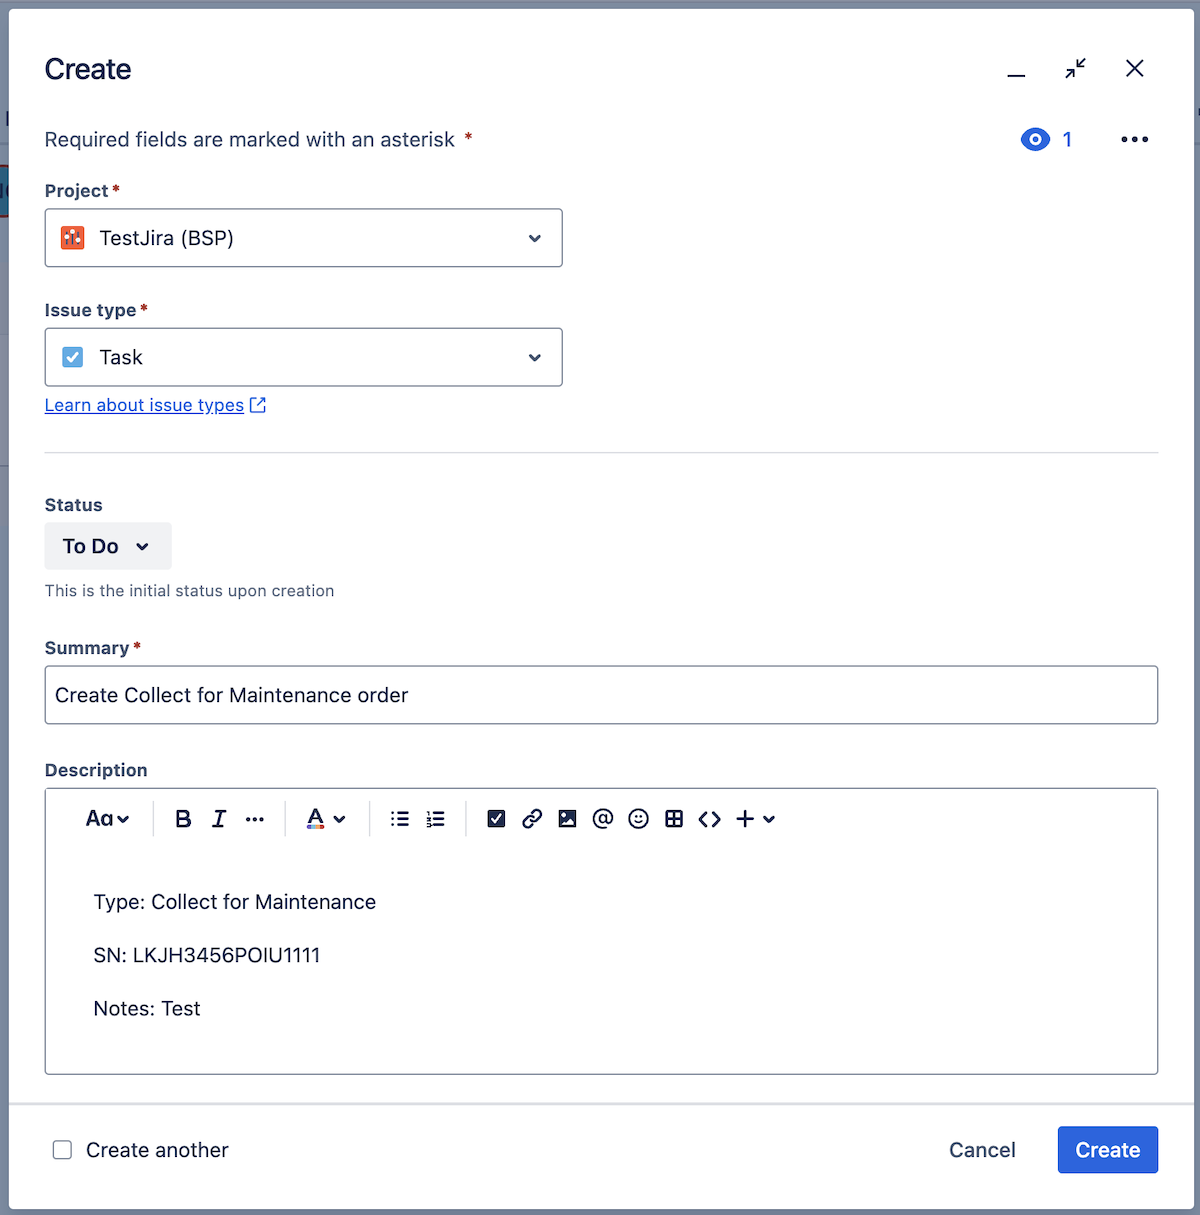
- Create a ticket in your Jira board.
- In the description, include the following fields:
- Required: Type (Order type) and SN (Serial number). If there are multiple products, divide serial numbers with commas. Check for and delete any spaces that may have been entered after the Type and SN.
- Optional: Notes
- Select Create.
- In the description, include the following fields:
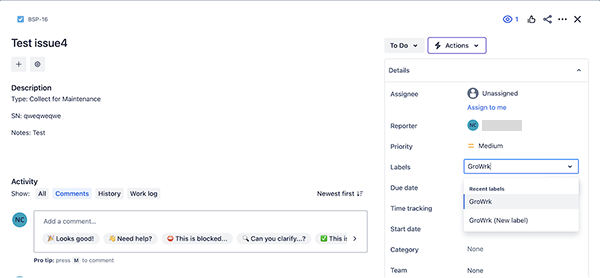
- To call the webhook endpoint, the ticket should be labeled GroWrk. Select the ticket and add the label.
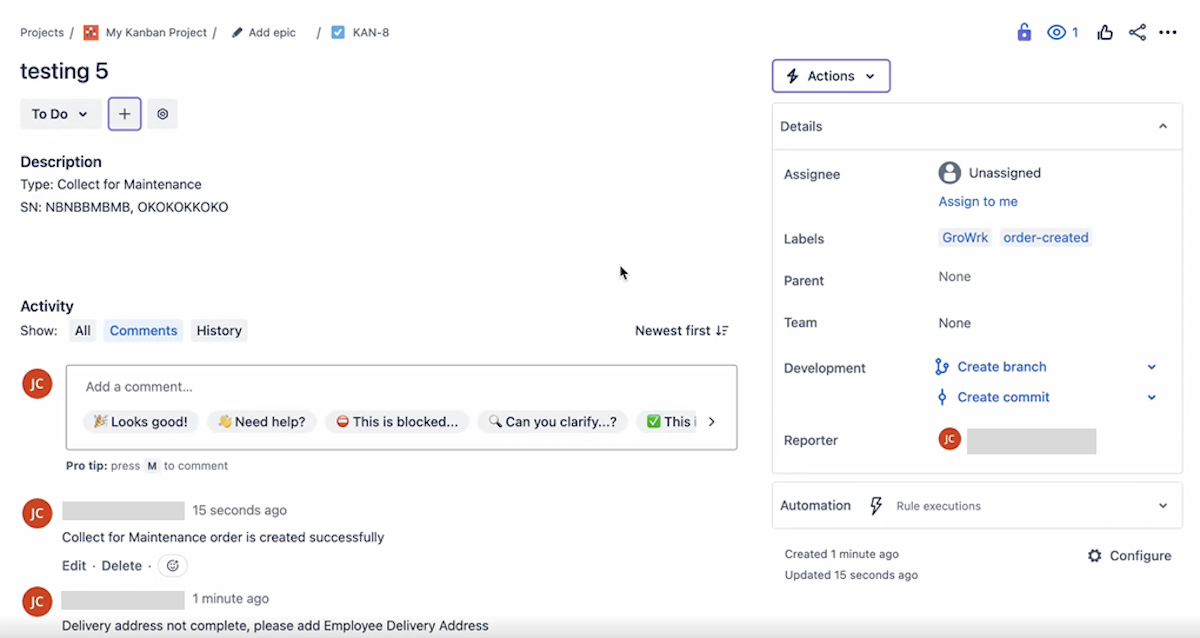
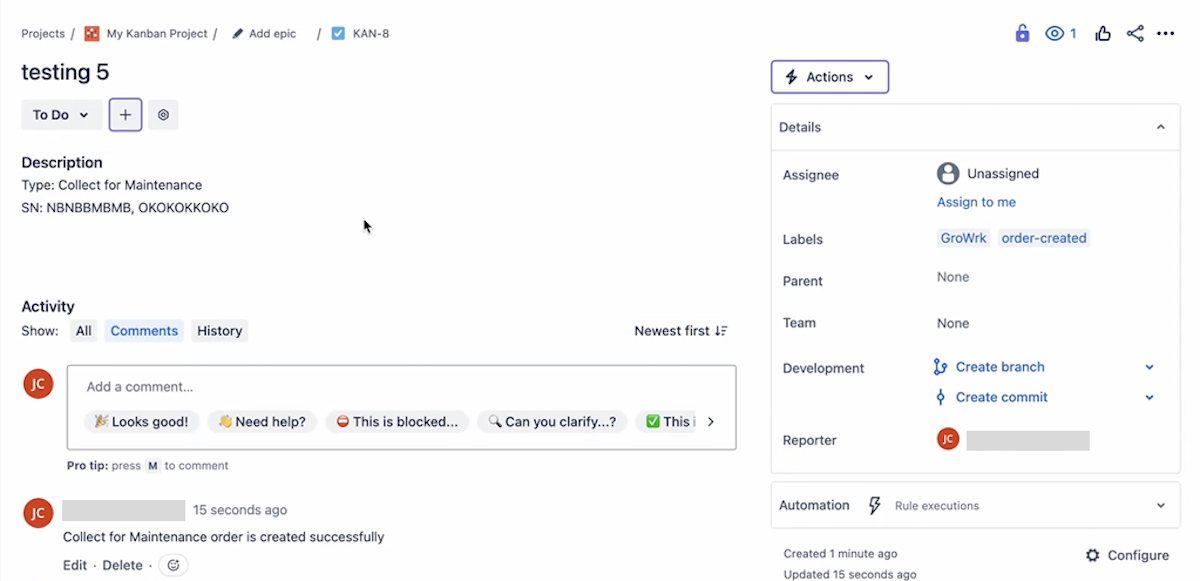
- The GroWrk and Jira ticket interaction results will be displayed. When successful, there will be a new comment stating that the order has been created. A new order-created label will be shown on the ticket.
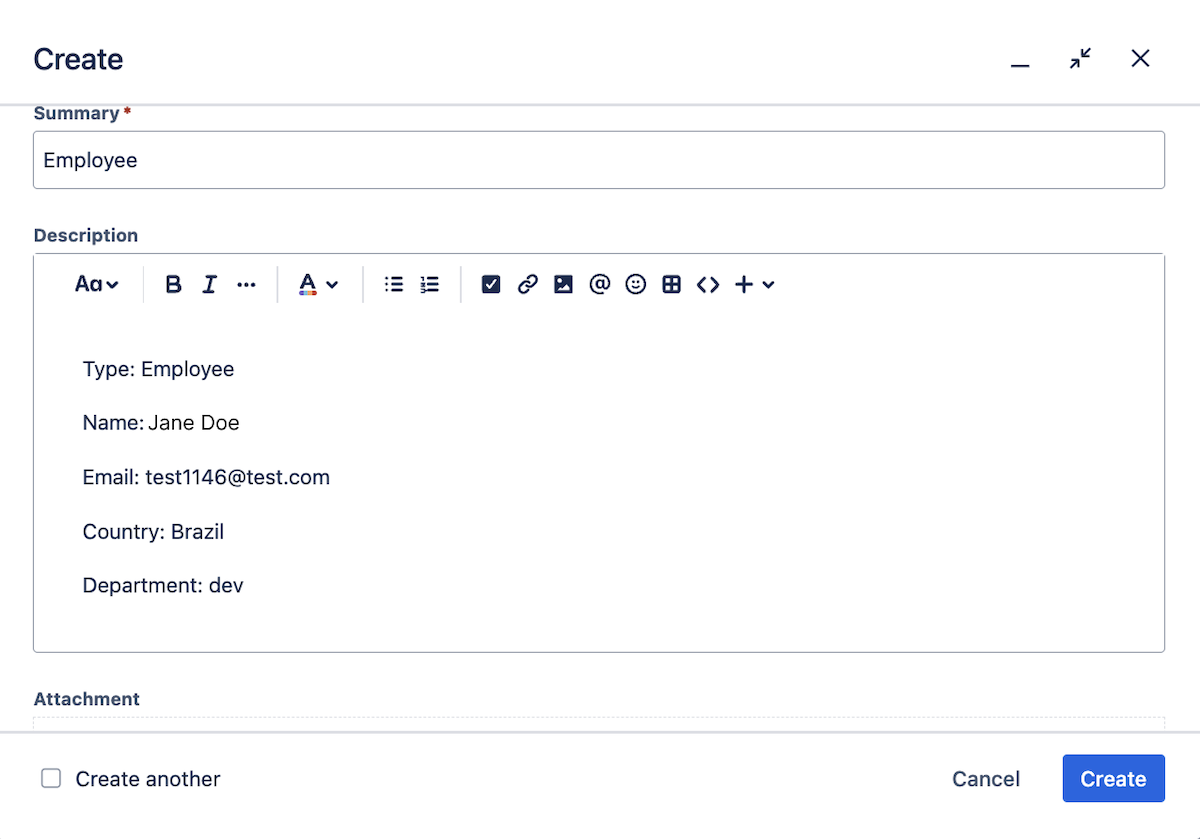
Create an employee
- Create a ticket in your Jira board.
- In the description, include the following fields:
- Required: Type (Employee), Name, Email, Country
- The Email must be the employee's email, written in plain text format (not a link).
- The country name must be written in English (no abbreviations).
- Optional: Address, APT, State, City, Phone, Alt Phone, Postal Code, Department, Division, Start Date, Job Title
- The format of Start Date is YYYY/MM/DD.
- The Department field will be the team name in GroWrk.
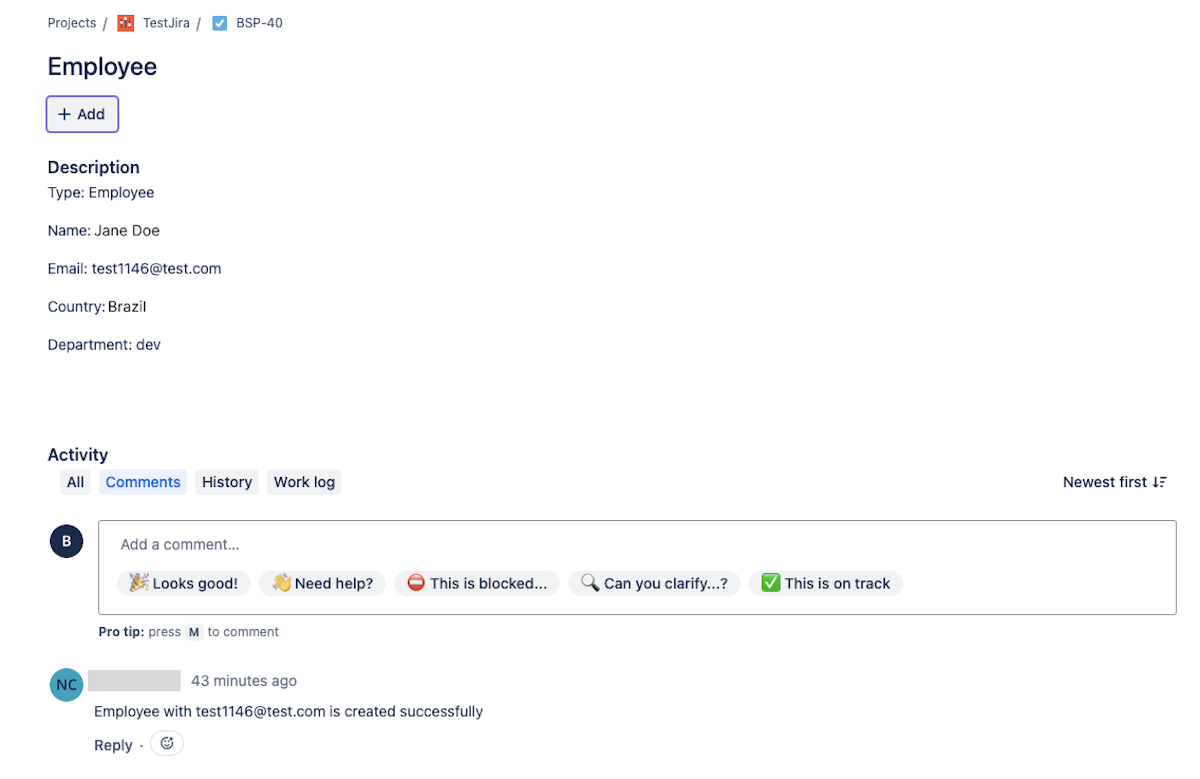
- Once the ticket is successfully created, a comment will confirm that the employee has been added. The new employee will be added to the Teams and Employees page in the GroWrk Dashboard.
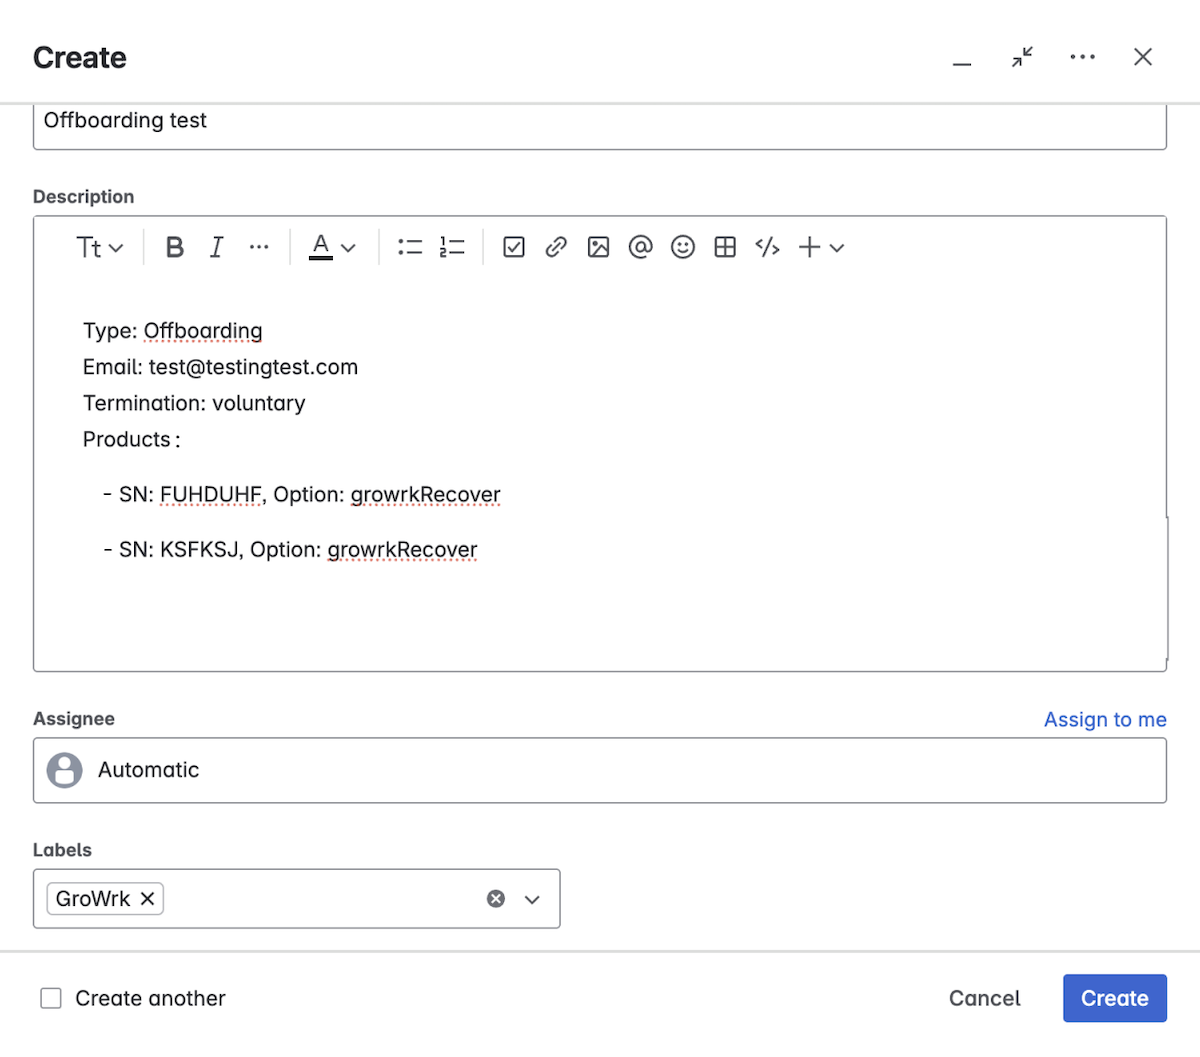
Offboard an employee
- Create a ticket in your Jira board.
- In the description, include the following fields:
- Required: Type, Email, Termination, Products
- The Email must be the employee’s email, written in plain text format (not a link).
- The Termination field must be written as Voluntary or Involuntary. This indicates the reason for the employee's departure.
- The Products field must list products assigned to the employee, formatted using hyphens (not bullet points):
- "- SN: PYE435ET45SDFG, Option: growrkRecover"
- The Option field must be written as Keep, clientRecover, or growrkRecover
- If the employee will be keeping the products, use Keep.
- If your company will facilitate recovery of products, use clientRecover.
- If you request GroWrk to recover the products, use growrkRecover.
- Optional fields: Date (For scheduled offboardings)
- Format: YYYY/MM/DD
- Format: YYYY/MM/DD
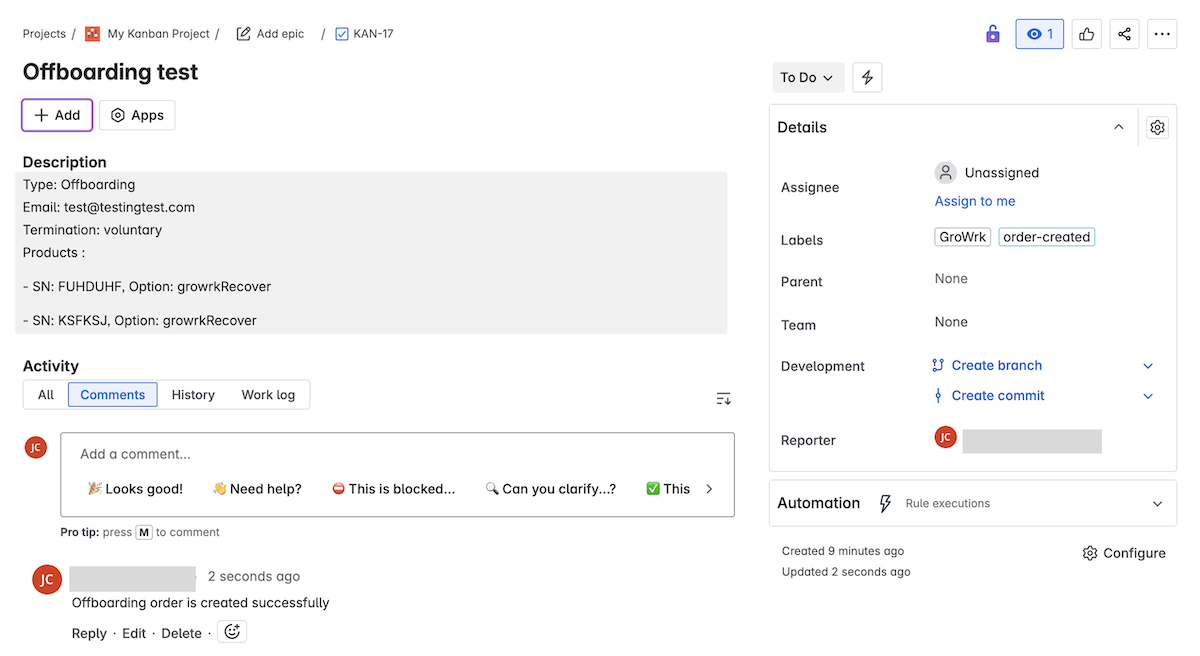
- Once the ticket is successfully created, a comment will confirm that the offboarding order was placed. The order will appear in the Dashboard, and your employee will be marked as Offboarding.
Resolve a failed ticket
- If the ticket failed, the latest comment will state the reason for failure and an order-failed label.
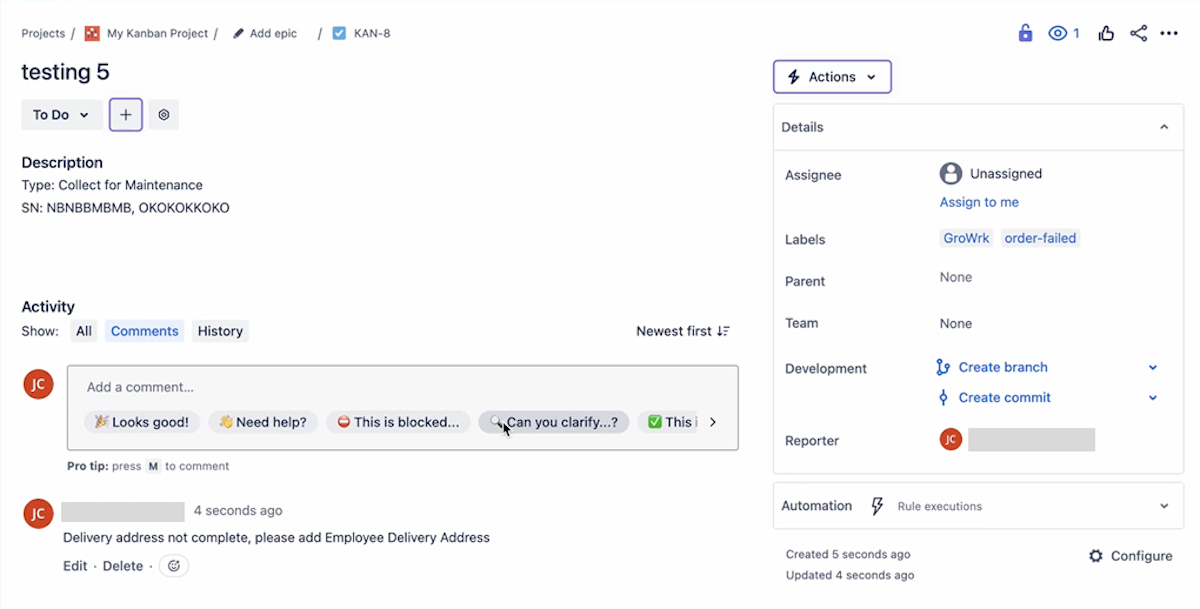
- Follow up on the failure based on the stated reason. For example, if the employee’s address is missing, update it in your Dashboard.
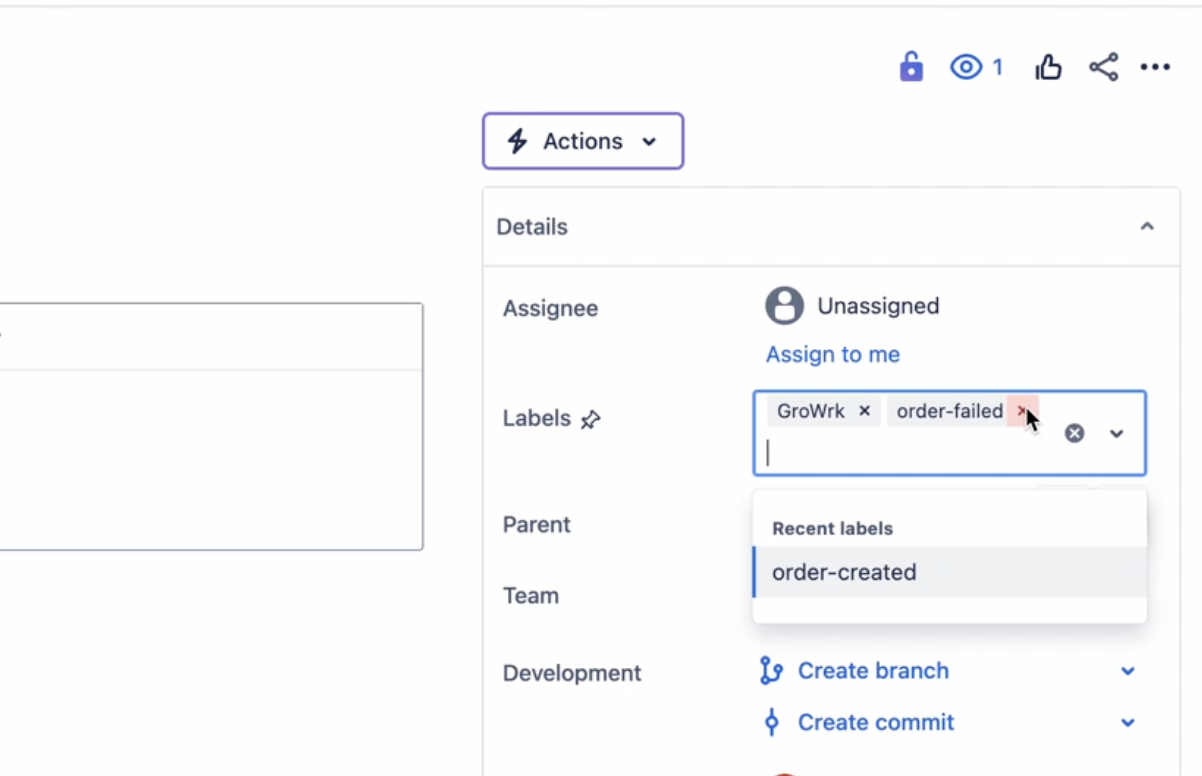
- Go back to the Jira ticket and remove the order-failed label.
- Your ticket will update automatically, and you'll receive a comment confirming the order was created successfully.